Using the custom URL schemes we can launch the application from anywhere. Custom URL schemes are also being used to check if the application is installed or not.
Using custom URL schemes we can pass some of the data to the application as a parameter, then the app process the data and show appropriate information to the user.
Note:From iOS 13 and later below function will no longer work.
func application(_ app: UIApplication, open url: URL, options: [UIApplication.OpenURLOptionsKey : Any] = [:]) -> Bool {
    return true
}
Adding URL Scheme in the Project
Follow the below steps to add a URL scheme
1: Open Project2: Select
Target3: Now select
Info and go to the URL Types and click on ‘+’4: Now in the ‘URL Schemes’ field enter your custom URL like your app name( in small and don’t use space). Suppose your app name is “Test App” the use
"testapp" as a custom URL scheme.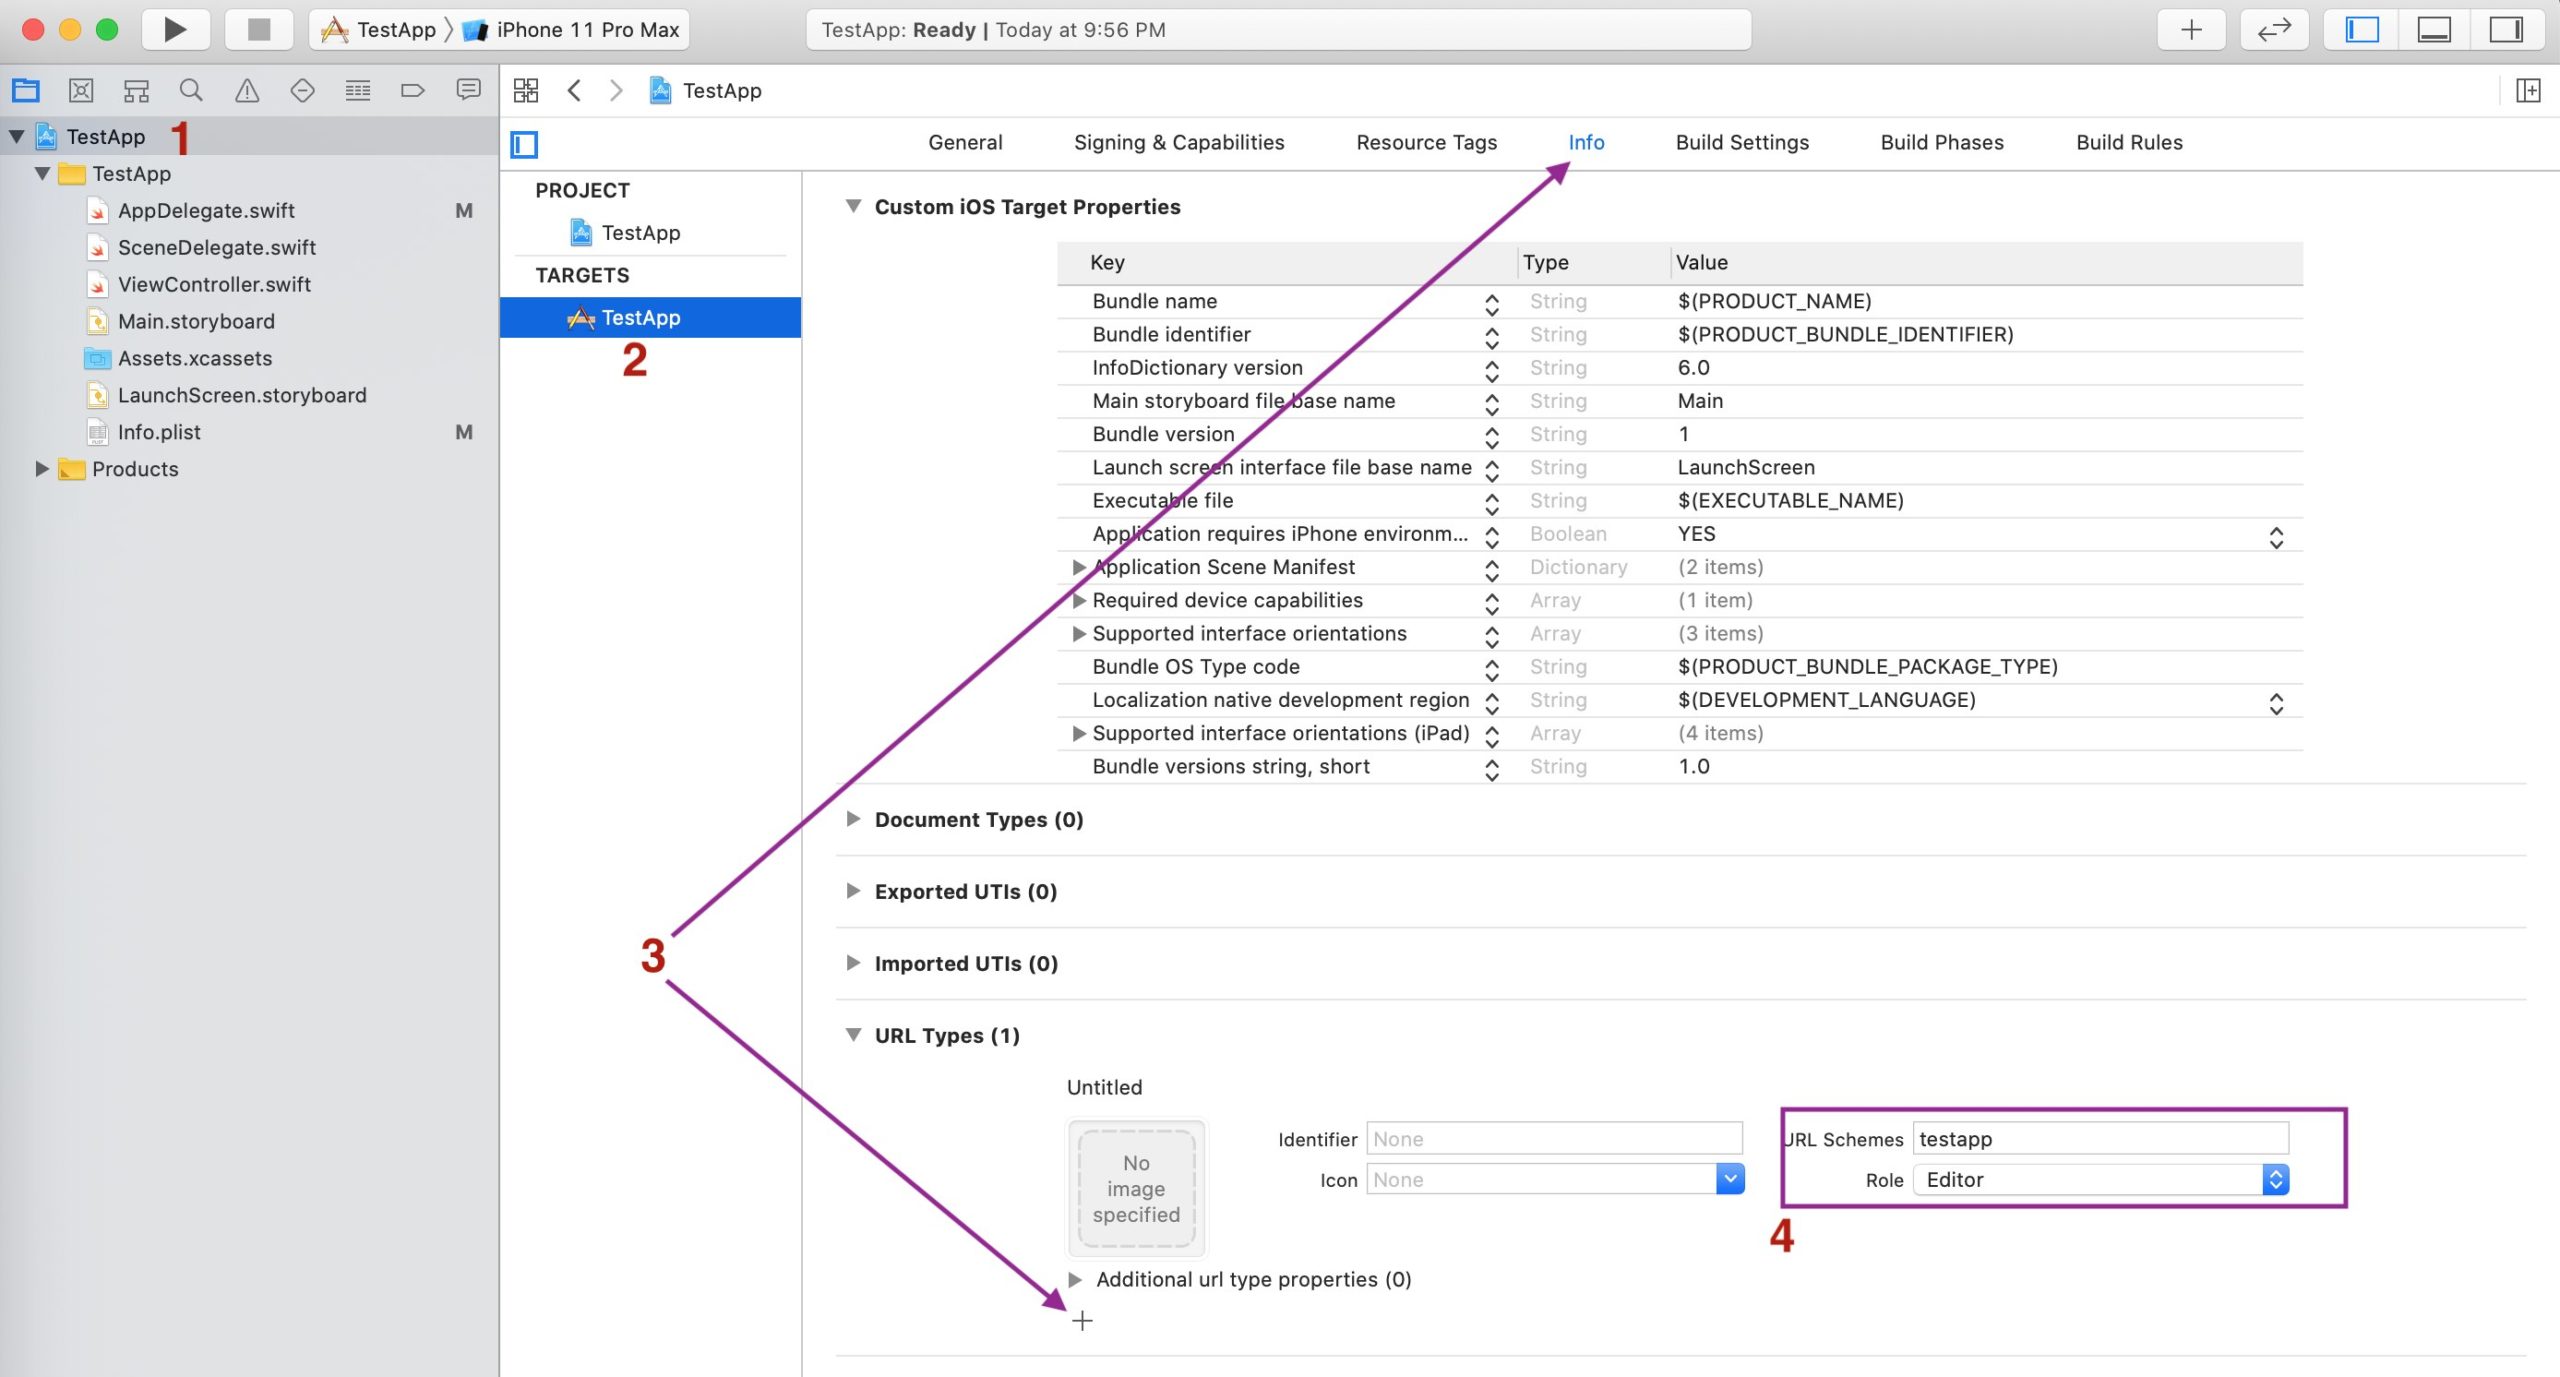
SceneDelegate class and write below function
import UIKit

class SceneDelegate: UIResponder, UIWindowSceneDelegate {

    var window: UIWindow?

    func scene(_ scene: UIScene, willConnectTo session: UISceneSession, options connectionOptions: UIScene.ConnectionOptions) {
        // Use this method to optionally configure and attach the UIWindow `window` to the provided UIWindowScene `scene`.
        // If using a storyboard, the `window` property will automatically be initialized and attached to the scene.
        // This delegate does not imply the connecting scene or session are new (see `application:configurationForConnectingSceneSession` instead).
        guard let _ = (scene as? UIWindowScene) else { return }
        self.scene(scene, openURLContexts: connectionOptions.urlContexts) // 1
    }


  func scene(_ scene: UIScene, openURLContexts URLContexts: Set) { //2
    if let url = URLContexts.first?.url {
      print(url)
    }
  }
1: Call this function so that deep linking will even work when your app is killed
2: This function will get called when the app is launched by deep-link. This function is define under UISceneDelegate
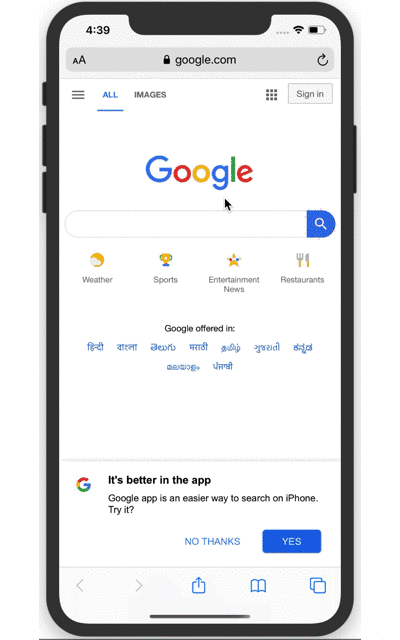
– Now run the application.
– Now open the Safari and type: testapp://
– Now Sarafi will ask your permission to launch the application.
Passing a parameter in custom URL Scheme
We can also pass a parameter in the URL scheme. Suppose you want to send a Product Id as a parameter and open a Product Detail page in the application then follow the below steps.
Note: you can pass more than one parameter as well.
Add the product id in the custom URL like "testapp://productId=97"
Now in the SceneDelegate class make the below changes
import UIKit

class SceneDelegate: UIResponder, UIWindowSceneDelegate {

  var window: UIWindow?

  func scene(_ scene: UIScene, willConnectTo session: UISceneSession, options connectionOptions: UIScene.ConnectionOptions) {
    // Use this method to optionally configure and attach the UIWindow `window` to the provided UIWindowScene `scene`.
    // If using a storyboard, the `window` property will automatically be initialized and attached to the scene.
    // This delegate does not imply the connecting scene or session are new (see `application:configurationForConnectingSceneSession` instead).
    guard let _ = (scene as? UIWindowScene) else { return }
    self.scene(scene, openURLContexts: connectionOptions.urlContexts) // 1
  }

  func scene(_ scene: UIScene, openURLContexts URLContexts: Set) {
    if let url = URLContexts.first?.url{
      print(url)
      let urlStr = url.absoluteString //1
      // Parse the custom URL as per your uses, this will change as per requirement
      let component = urlStr.components(separatedBy: "=") // 2
      if component.count > 1, let productId = component.last { // 3
        self.pushToProductDetailSceen(productId: productId) // 4
      }
    }
  }
1: Convert URL into String
2: Parse the URL String in order to get the Product Id
3: Add your condition, this will change as per your uses
4: Call this function to push Product Detail Screen
5: Get the UINavigationController object from the root
6: Get the Main UIStoryboard
7: Create a ProductDetailViewController class object
8: Pass the Product Id
9: Push the ProductDetailViewController object into the navigation stack.
Now run the application.
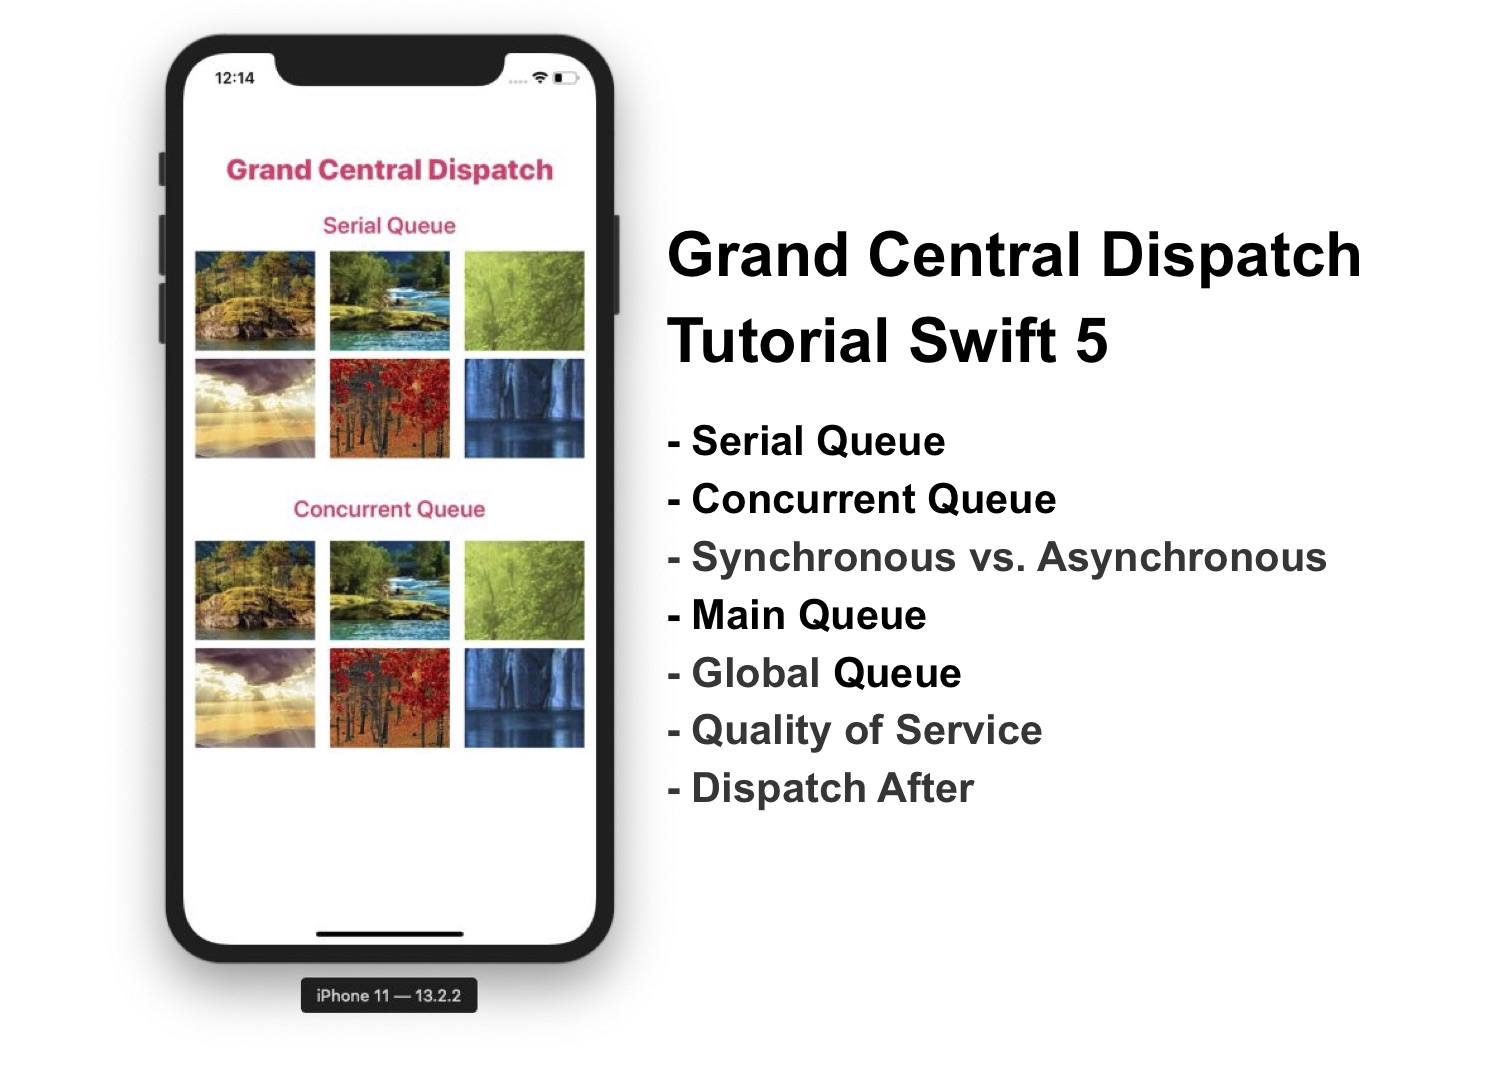
Read our next article: Grand Central Dispatch Tutorial Swift 5