UITableView expand collapse is a very common feature and there are tons of tutorials available, but for the new developer this is little hard to understand so here we are going to create a demo project in a super easy way and with very less code.Now let’s start coding.
– Create a new project and choose Single View App
– Name it CollapsExpand or whatever you like.
Now open
Main.storyboard and do below changes.
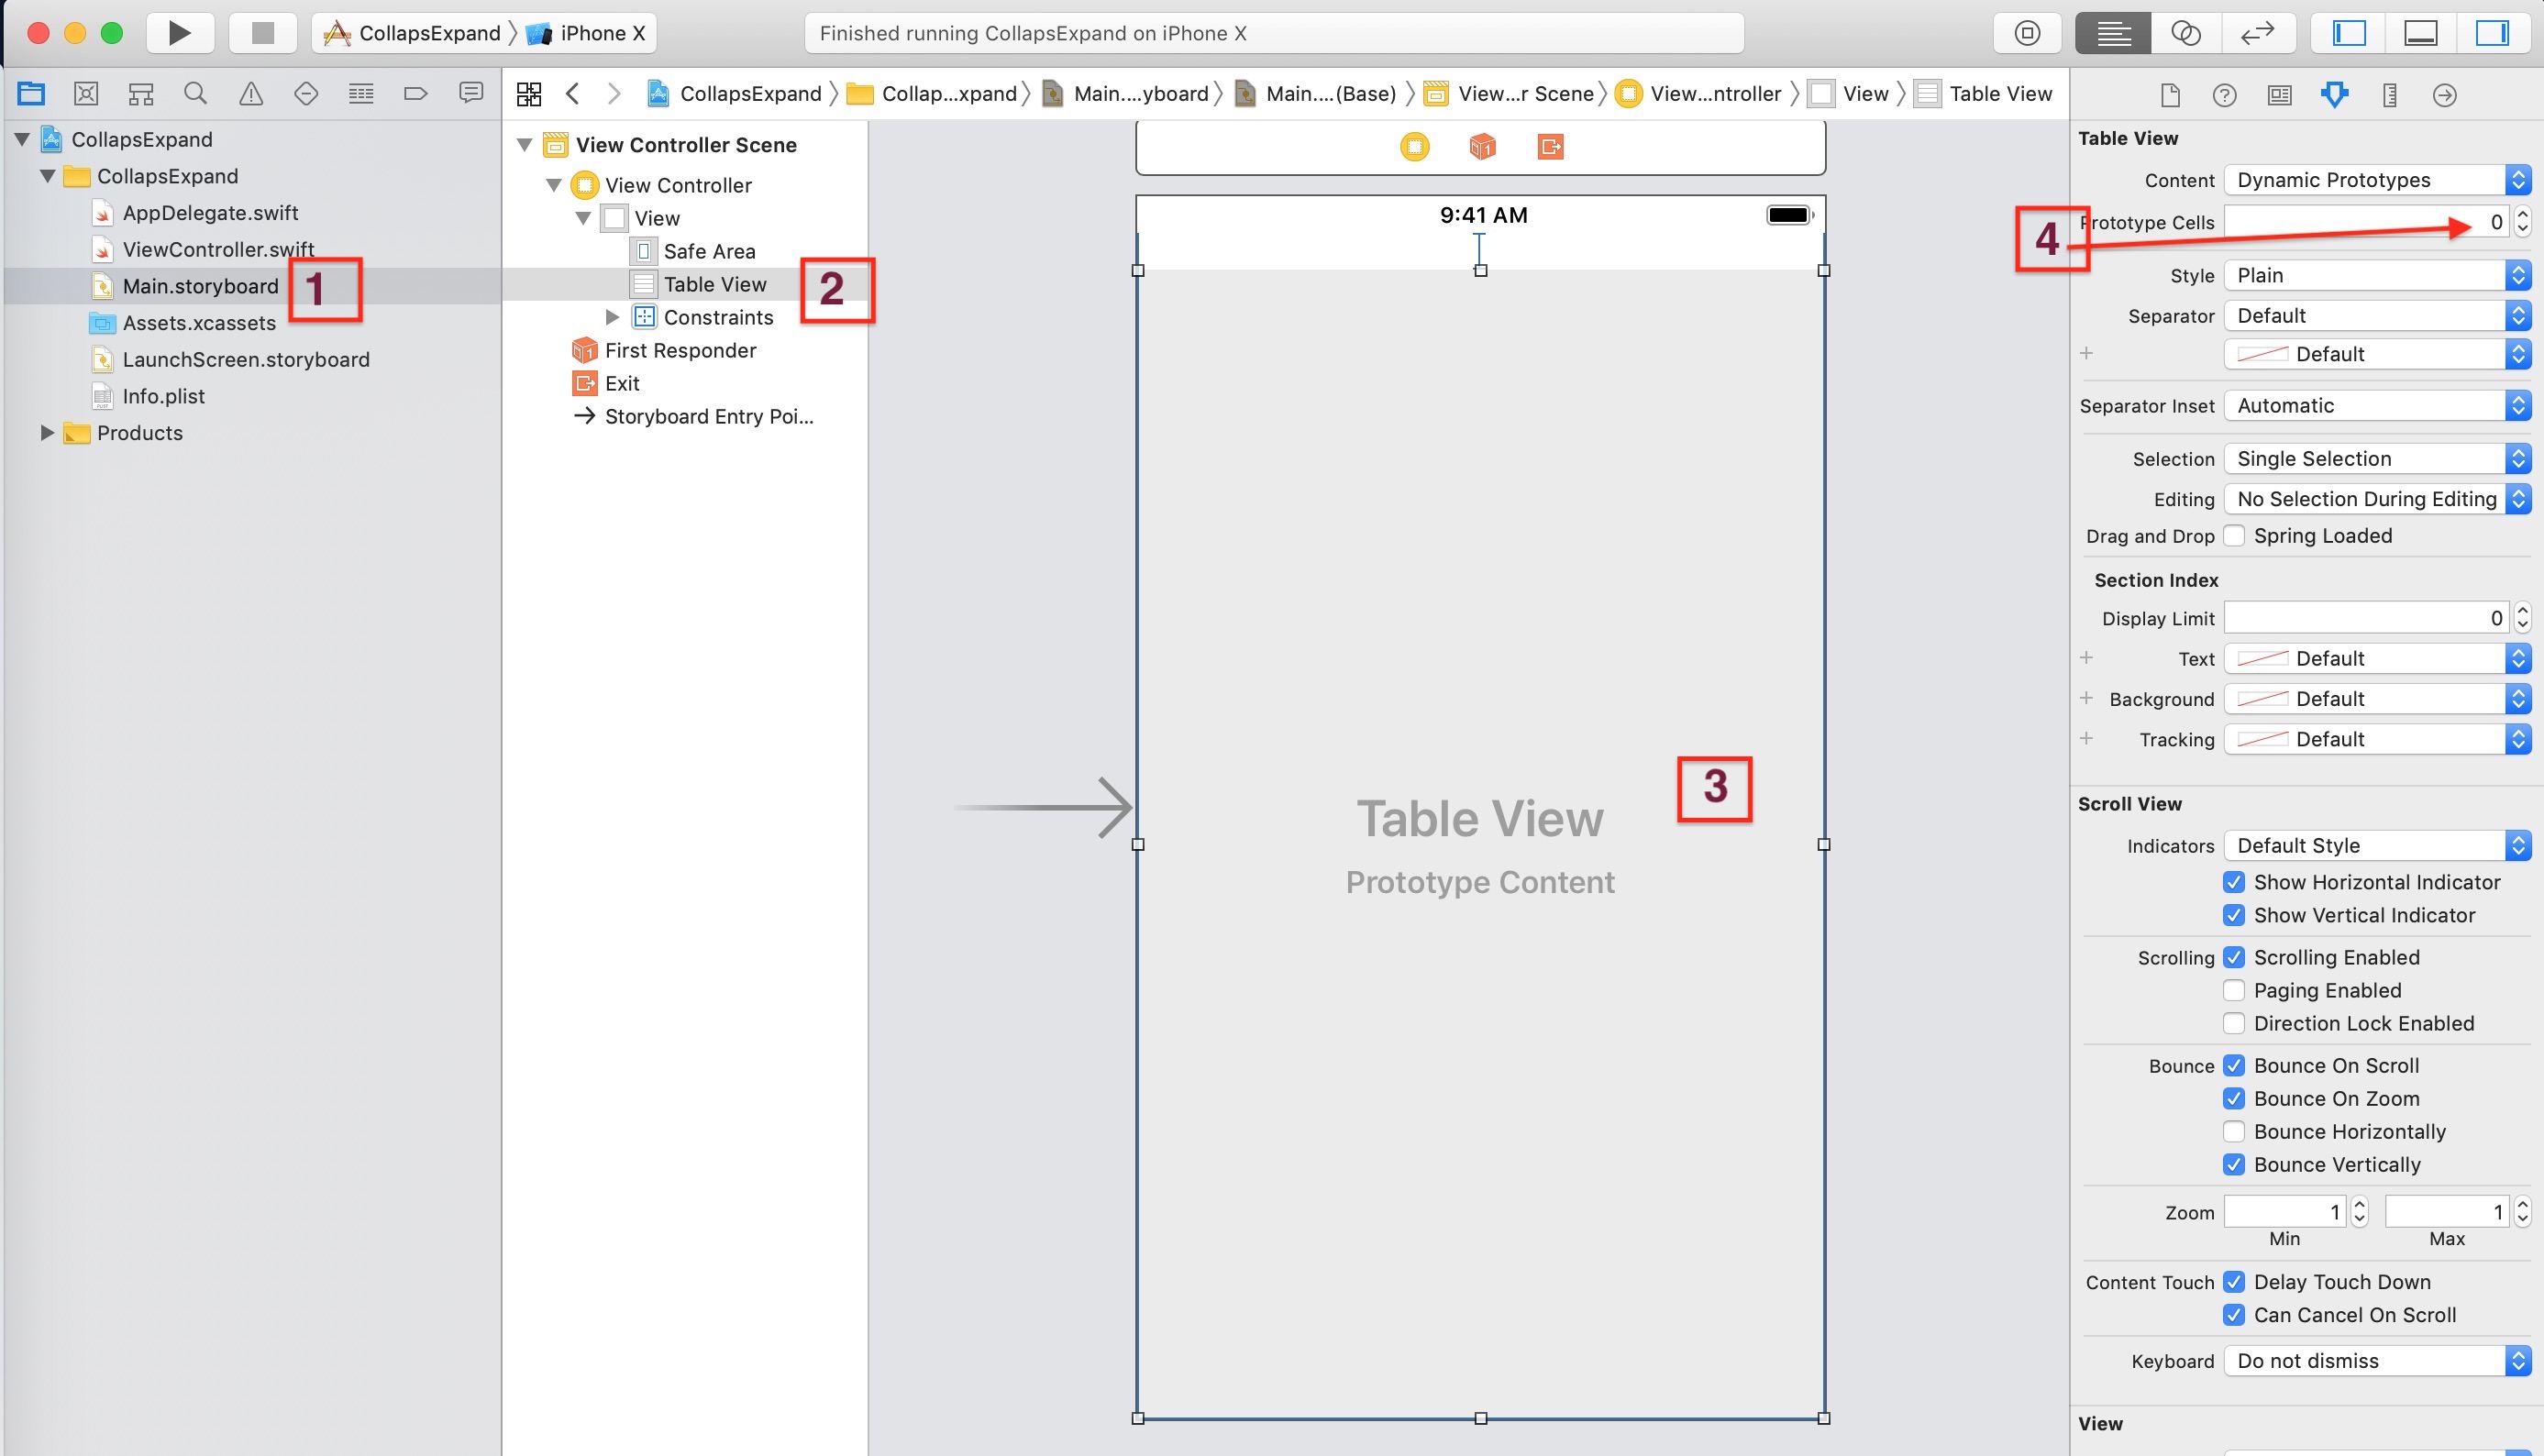
Main.storyboard2: Drag and drop a
UITableView3: Create an
IBOutlet of UITableView and name it tableView4: Change the Prototype Cells from 0 to 1 in order to use the default cell. You can use your custom cell as well. After changing it to 1 it will automatically add a cell inside
UITableView.
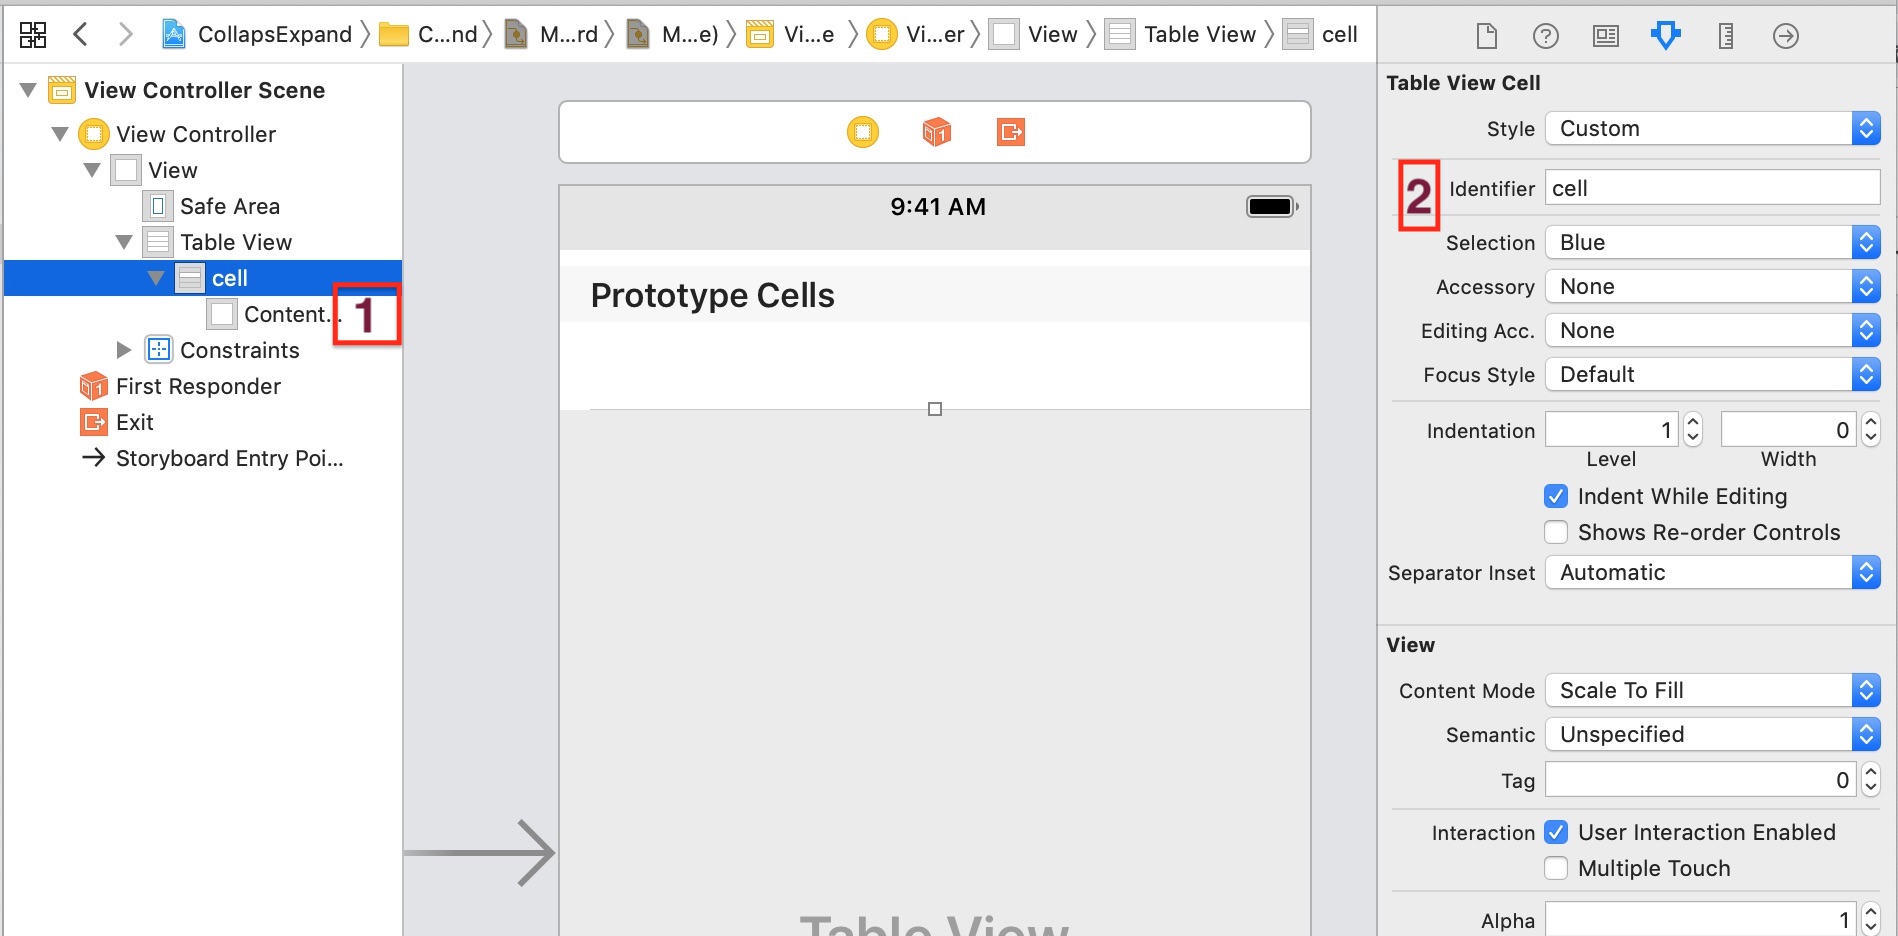
UITableViewCell is added automatically for you, now select this Cell.2: Add Identifier cell, this identifier will be used to get this Cell.
Move to ViewController Class
Add below code in yourViewController class.
class ViewController: UIViewController {

    @IBOutlet weak var tableView: UITableView! // 1
    var arrayHeader = [1, 1, 1, 1] // 2 Array of header, change it as per your uses

    override func viewDidLoad() {
        super.viewDidLoad()
        // Do any additional setup after loading the view, typically from a nib.
        self.tableView.dataSource = self // 3
        self.tableView.delegate = self
    }
}

extension ViewController: UITableViewDataSource, UITableViewDelegate {

    func tableView(_ tableView: UITableView, heightForHeaderInSection section: Int) -> CGFloat {
        return 40
    }

    // 4
    func tableView(_ tableView: UITableView, viewForHeaderInSection section: Int) -> UIView? {
        let viewHeader = UIView(frame: CGRect(x: 0, y: 0, width: UIScreen.main.bounds.size.width, height: 40))
        viewHeader.backgroundColor = UIColor.darkGray // Changing the header background color to gray
        return viewHeader
    }

    // 5
    func numberOfSections(in tableView: UITableView) -> Int {
        return arrayHeader.count
    }

    func tableView(_ tableView: UITableView, numberOfRowsInSection section: Int) -> Int {
        // 6 Change the number of row in section as per your uses
        return 4
    }

    // 7
    func tableView(_ tableView: UITableView, cellForRowAt indexPath: IndexPath) -> UITableViewCell {
        let cell = tableView.dequeueReusableCell(withIdentifier: "cell", for: indexPath)
        cell.textLabel?.text = "section: \(indexPath.section)  row: \(indexPath.row)"
        return cell
    }
}
IBOutlet of UITableView which we have created2: arrayHeader will use to return the number of headers. We will cover later that why this array is having 1.
3: Connect dataSource and delegate of
UITableView4: Create a
UIView and return it as header5: Return number of the section using arrayHeader count
6: Return number of the row for section, change is as per your uses
7: Here we are getting a Prototype cell which we have added earlier and returning this.
Now run the project and you will get below output.
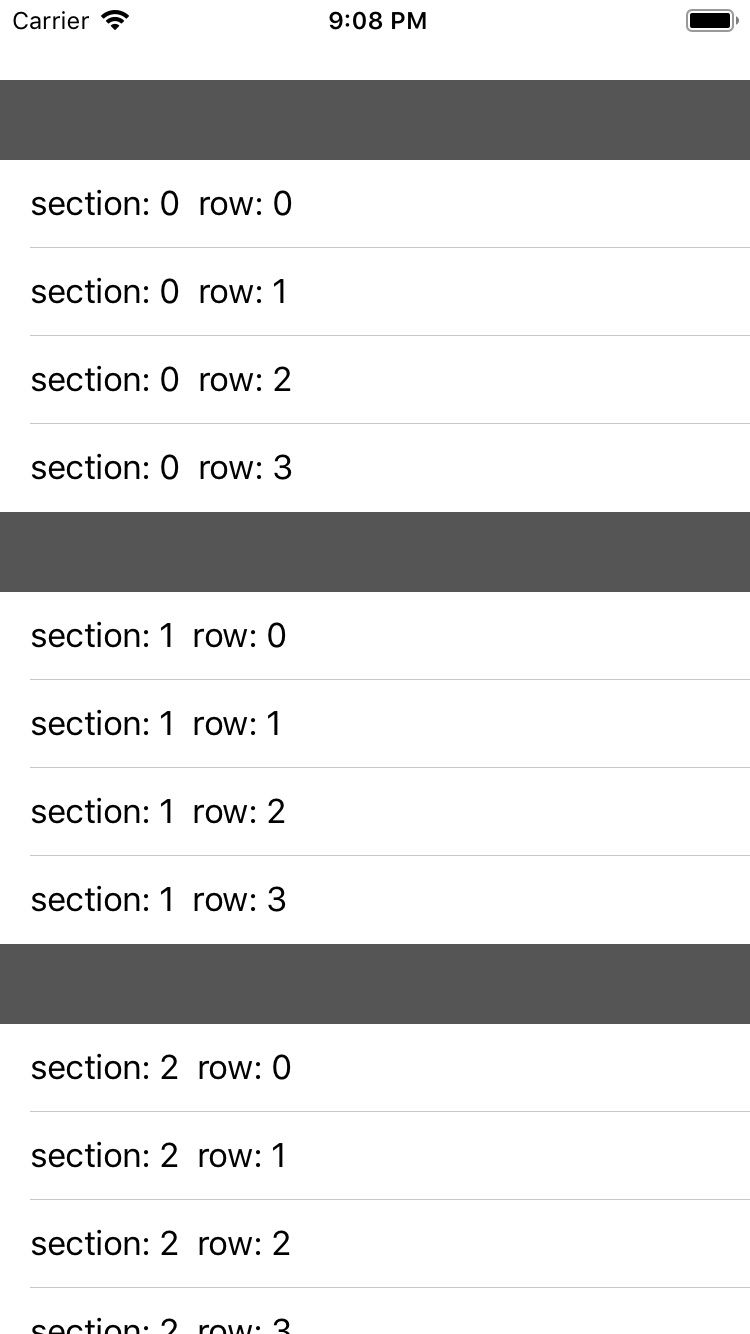
UIButton over this gray header and on click of that button the Cells will be expand and collapse.
Making UITableViewCell Expand and Collapse
Let’s do the below changes to make our Cells expand and collpaseUpdate viewForHeaderInSection function
Create aUIButton and add it over header view, also add a selector on this button.
    func tableView(_ tableView: UITableView, viewForHeaderInSection section: Int) -> UIView? {
        let viewHeader = UIView(frame: CGRect(x: 0, y: 0, width: UIScreen.main.bounds.size.width, height: 40))
        viewHeader.backgroundColor = UIColor.darkGray // Changing the header background color to gray
        let button = UIButton(type: .custom)
        button.frame = viewHeader.bounds
        button.tag = section // Assign section tag to this button
        button.addTarget(self, action: #selector(tapSection(sender:)), for: .touchUpInside)
        button.setTitle("Section: \(section)", for: .normal)
        viewHeader.addSubview(button)
        return viewHeader
    }
tapSection function in your ViewController class just below viewDidLoad function
    @objc func tapSection(sender: UIButton) {
        self.arrayHeader[sender.tag] = (self.arrayHeader[sender.tag] == 0) ? 1 : 0
        self.tableView.reloadSections([sender.tag], with: .fade)
    }
Cells are expanded and 0 means Cells are collapsed.
Update numberOfRowsInSection logic
  func tableView(_ tableView: UITableView, numberOfRowsInSection section: Int) -> Int {
    // 6 Change the number of row in section as per your uses
    return (self.arrayHeader[section] == 0) ? 0 : 4
  }
Definitely, what a splendid website and revealing posts, I will bookmark your website.All the Best!
There are no words to show my appreciation!
You have used Int array. Can you please let me know how to add for string array instead?